Update, Install and Configure Samba
First, update you Ubuntu system:
sudo apt-get update
sudo apt-get upgrade
Then, install Samba:
sudo apt-get install samba
Rename the default Samba configuration file and create a new file with the following content:
sudo mv /etc/samba/smb.conf /etc/samba/smb.conf.backup
sudo nano /etc/samba/smb.conf
New Samba configuration content:
[global]
  disable netbios = yes
  workgroup = WORKGROUP
  server string = %h server (Samba, Ubuntu)
  dns proxy = no
  interfaces = 127.0.0.0/8 eth0
  bind interfaces only = yes
  smb ports = 445
  log file = /var/log/samba/log.%m
  max log size = 1000
  syslog = 0
  panic action = /usr/share/samba/panic-action %d

  ####### Authentication #######
  server role = standalone server
  passdb backend = tdbsam
  obey pam restrictions = yes
  unix password sync = yes
  passwd program = /usr/bin/passwd %u
  passwd chat = *Enter\snew\s*\spassword:* %n\n *Retype\snew\s*\spassword:* %n\n *password\supdated\ssuccessfully* .
  pam password change = yes
  map to guest = bad user

  ############ Misc ############
  usershare allow guests = yes

#======================= Share Definitions =======================
[printers]
  comment = All Printers
  browseable = no
  path = /var/spool/samba
  printable = yes
  guest ok = no
  read only = yes
  create mask = 0700

[print$]
  comment = Printer Drivers
  path = /var/lib/samba/printers
  browseable = yes
  read only = yes
  guest ok = no

[hot-folders]
  path = /wwwroot/production/hot-folders
  browseable = yes
  readonly = no
  force create mode = 0660
  force directory mode = 2770
  valid users = hf_user
The section heading [hot-folders] is where we declare the share, where hot-folders will be the name of our share. This share will map to the folder /wwwroot/production/hot-folders (which we will create later) and the valid users lists all the system groups (prefixed with an @) and users that have permission to access this share. We are going to create a user call hf_user and give this user permission to access this share.
Create Samba Users
Create a new user called hf_user with no home folder, nologin script and assigned to an existing system group sambashare:
sudo adduser --no-create-home --shell /usr/sbin/nologin --ingroup sambashare hf_user
Now set the user's Samba password and enable the account. Note the Samba password can be different to the login password. But it is this password you will have to use to access the shared folder.
sudo smbpasswd -a hf_user
sudo smbpasswd -e hf_user
Create Shared Folder
Create shared folder, set ownership and permission for the share:
sudo mkdir -p /wwwroot/production/hot-folders
sudo chown -R hf_user:sambashare /wwwroot/production/hot-folders
sudo chmod -R 2770 /wwwroot/production/hot-folders
Update Firewall
If your firewall is enabled, you will need to add a rule to allow SMB traffic to passthrough. The simple option is just to use the following command:
sudo ufw allow samba
The rules for Samba can be found in the following folder: /etc/ufw/applications.d
You could also restrict access to specific IP addresses, ranges or subnets.
Restart Samba Server and Test Shared Folder
Restart the Samba service:
sudo service smbd start
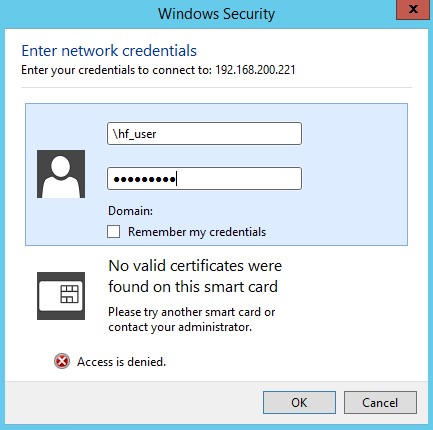
To test the share, we will hop onto a Microsoft Windows Server and open File Explorer and type in the IP address of the Ubunto server in the address bar. In our case, the Samba server is \192.168.200.221.

Explorer will display the shared folder. If we attempt to open the folder, you will be challenged to enter valid credentials to access this folder.
